


Valenta Loco is a powerful and smooth-running micro:bit based Lego compatible locomotive. It is equipped with Valenta Zero robotics controller that can be controlled by a micro:bit for playing with Lego train and rail ecosystem. The locomotive has two (x2) micro gear motors in the bogies and two (x2) LED headlights. You can use Lego Technic bricks to build your unique body shell on the locomotive.
This kit offers amazing self-directed learning opportunities through DIY. We've launched hands-on sample codes and tutorials at Instructables. You can also check Thingiverse and 3D print your own Lego compatible rail tracks based on your layout plan. We've wanted to launch this project for makers, educators and enthusiasts of broader ages and tinkering levels.
Valenta Loco can be coupled perfectly with Lego train!


Controlling with Two (x2) Micro:bits

Using one micro:bit as the transmitter and another one as the receiver, you can remotely control Valenta Loco! You can download ready-to-play MakeCode sample files at Instructables tutorial and you can play immediately! These sample files can be used for micro:bit first version (V1) and second version (V2). Setting up the locomotive is friendly. Insert the batteries, download the sample files to your micro:bits and power on!
- Go forward or backward by pressing the button A or B on your "transmitter" micro:bit. Stop the locomotive by pressing the button A and B together.
- Power on Valenta Zero motor controller and LED headlights will light up!


Controlling with iPad (iPhone)

You can use iPad (iPhone) as the game pad for controlling Valenta Loco! You can download ready-to-play MakeCode sample file at Instructables tutorial and you can play immediately! Setting up is friendly. Get official micro:bit app to your iPad (iPhone) and pair it with "receiver" micro:bit on the locomotive.
- Pressing gamepad button A or B will let the locomotive go forward or backward.
- Releasing gamepad button A or B will let the locomotive stop.


Assembly and setup
Assembling has never been easier! You can build the locomotive with lots of fun and confidence. There are no needs for too many challenging processes, like soldering or painting. Simply follow each assembling step at Instructables tutorial here.

Creating 3D Mod Parts
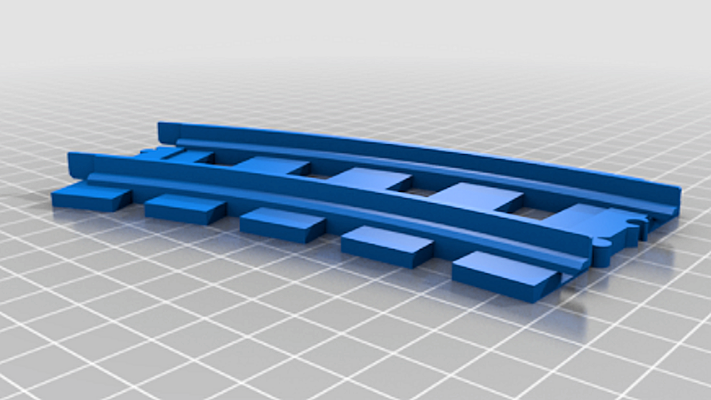
You can download various functional parts and 3D models available at Thingiverse. You can try 3D printing to create new mod parts for Valenta Loco! Try 3D printing Lego compatible rail tracks and expand your layout!


Electronics


The locomotive is equipped with micro:bit based motor controller called Valenta Zero. It contains a small motor controller (DRV8833) for controlling a DC motor on each bogie. There are four (x4) input and output (I/O) pins P0, P1, P2 and P8 for connecting devices like LED headlights. Each of P0, P1, P2, P8 pins is made of three pins, (S) Signal (yellow wire cable), (V) Voltage (red wire cable) and (G) Ground (black wire cable). These pins can operate at 3.3V or 5V (selectable) and please choose 5V for connecting LED headlights.
We can find red and black wires coming from each of the bogie on the locomotive. They are motor cables.
- Pick up a motor cable and put its red wire to the left pin on M1 and its black wire to the right pin on M1 as shown in the figure.
- Pick up another motor cable and put its red wire to the left pin on M2 and its black wire to the right pin on M2 as shown in the figure.
If you have a train body shell equipped with front LED headlights, you can light them up! Say let's choose P8 for connecting these LED headlights. Put its red wire to (V) Voltage pin at P8 and its black wire to (G) Ground pin at P8 as shown in the figure. LED headlights are ready to light up when the power is on.


Valenta Off-Roader is the collaboration product mutually developped by Hummingworks LLC and 4Tronix. All rights reserved. Humming Works LLC is the product house that designs engineering programs and kits for educators and makers. 4Tronix is the supplier of educational electronics. It makes electronics boards for BBC micro:bit, Arduino and Raspberry Pi.
Safety and Care Instructions
We have designed our products to be both fun and safe. These products are purposefully designed to be friendly with users of broader ages including children, so accidents from unintended uses are less likely. We minimize excessive details, reduce sharp edges and use eco-friendly materials so that the models are made safe for playing.
Before playing, please read and understand carefully all available instructions, manuals and tutorials of the product and related information posted on the website. Please help the child users better understand how to use the product safely by accompanying together with proper supervision. Stop playing if there are any questions and please contact us for support.
To play with any electronic modules and power supply, we recommend careful adult supervision and mentoring at all times. Our products can offer something to explore mainly for the builders aimed at ages 14+. This is an ideal introductory micro:bit STEM DIY kit for young builders. Do not give this product to children under the age of 5.
The kit requires new, single-use 1.5V AA batteries separately. Insert the batteries to the holder in the correct orientation and do not reverse polarity. Do not mix batteries of different types or ages. Replace all batteries at the same time. You can gently clean your model with a cloth. We do not recommend washing with household cleansers, such as anti-bacterial liquid sprays or detergent. Our models are designed with reliability in mind, but if you experience problems, or in the unlikely event of a breakdown, just contact us to get our support. We want to be able to assist you and promise to do what we could to fix your problems.